Clean/Replace the receiver’s fan filters
It is recommended to periodically clean or replace the fan filter as dust will accumulate over time. Follow the steps below to efficiently clean or replace the filter for optimal performance.
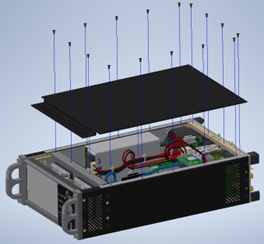
1. Remove the Top Plate
Locate the screws securing the top plate and unscrew them to detach the top plate
from the unit.


Attention: The screws securing the top plate are
Pozidriv, not Philips, and should be removed using a #1 tip Pozidriv screwdriver to
avoid stripping. If stripped, removal may require assistance from machinists.
2. Access the Fan Filter
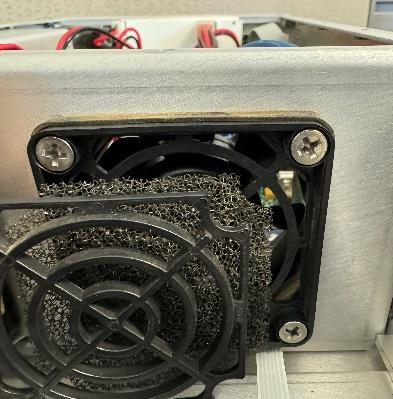
- Once the top plate is removed, you'll find a front plastic foam retainer.
- The foam is held in place by a clip-in front retainer, which can be gently
teased off using a flat head screwdriver or similar.Tip: Mounting screws do not have to be removed to remove the retainer.
- Carefully remove this retainer to access the foam and filters.

3. Clean/Replace the Foam Filter
Cleaning:
Once you clip out the foam and filters from their housing, clean them thoroughly using a soft brush to remove dust and debris effectively.
Replacing:
-
Replacement filter can be purchased at, 30 PPI Foam Media.
-
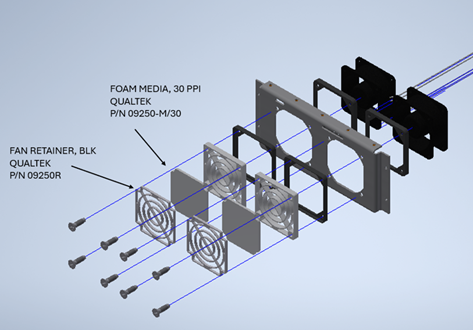
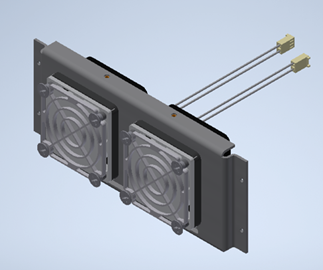
Secure the replacement filter back by clipping the front retainer back into the housing place.Note: Some units may have the fan filter assembled in reverse, making it difficult to access the filter/retainer without removing the mounting screws. If you encounter this issue, refer to the drawing below, which clearly illustrates how the filter assembly should be mounted so that the filter and retainer are forward-facing, allowing easy access.
Figure 1. Fig: Assembly Layers Before Fastening 
Figure 1. Fig: Final Assembly with Secure Fastening 
4. Re-assemble the Top Plate
Close the top plate back onto the unit and secure it by fastening the screws back into their original positions.
